
Author: Brad Harris
Intro: RBAC Walked So ABAC Could Run
Fresh off the boat from the Databricks Data & Ai Summit I came across this new feature in Databricks in Beta right now called Attribute Based Access Control ABAC for short. While I try my best to keep up with new features I probably would have never came across this feature had it not been for the summit. As my current role limited me to working with the Gov release of Databricks in which Unity catalog was not available nor any of these beta features. So, to my detriment I started down the road of exploring this new feature in Databricks. Before this new feature we had a trusty old gatekeeper called RBAC (Role-Based Access Control). It was simple: you got a role (like “Data Scientist” or “Guy Who Clicked the Wrong Button That One Time”) and that role decided what you could access.
But then came the chaos…
- “Why can’t Joe Schmo access this Delta table in Region B?”
- “Why is the Entry level data engineer running ETL jobs in production?”
- “Why is the Finance department reading all the PII data?!”
And the answer was always: because RBAC can’t think beyond the role. It’s like giving someone the keys to your house because they said they were your “friend.”
Enter stage left: ABAC – Attribute-Based Access Control. Databricks looked at your overly permissive spaghetti mess and said, “Let’s give access control some actual brains.”
So, What is Attribute Based Access Control, Really?
ABAC is like RBAC’s cooler, brother (the one that was always in style and that everyone looked up to)
Databricks defines ABAC as – “ABAC is a data governance model that provides flexible, scalable, and centralized access control across Databricks. ABAC complements Unity Catalog’s existing privilege model by allowing policies to be defined based on governed tags, which are applied to data assets. This simplifies governance and strengthens security posture.” But breaking this down into more laymen’s terms it can be summarized as.
Instead of granting access based on just roles, ABAC looks at attributes of:
- The user (e.g., department, region, security clearance)
- The resource (e.g., data sensitivity level, geography, owner)
- The environment (e.g., time of day, login method, project tag)
Think of it like this:
“Alice is in the Marketing team, accessing data labeled Internal-Use, from East US, during business hours → Access granted.”
But:
“Alice tries to access Customer-PII, labeled Highly Confidential, from a beach in Cancun → Access denied.”
Databricks + Unity Catalog + ABAC = Crème De La Crème
Databricks brings Attribute Based Access Control to life through Unity Catalog. You can define dynamic data access policies using tags and attribute-based rules, and they apply across workspaces. A few fun highlights:
1. Tag-Driven Access
You can label tables, views, columns (yes, even columns!) with metadata like:
- data_classification = “confidential”
- region = “us-east”
- pii = true
Then define policies like: Only users where department = “Finance” can query tables where data_classification = “confidential”.
2. Row & Column-Level Security with Personality
You can restrict access within a table. Example:
Bob from HR sees only rows where region = “Europe”, while Alice in Marketing gets rows from region = “US”.
And you can redact sensitive columns unless someone is “in the know.”
No more duplicating tables just to hide one column. That’s so 2019.
How do I start playing around with ABAC?
Well, I could just give you a simple one or two liner that says do this and do that, but I figured I would dig in and give you a real-world example of how to use Attribute based access control. But honestly if you just wanted the steps they could be summed up by the following. Be advised these steps could be different for what you are trying to do, but for this example these are steps that I am taking.
- Enable the tag policies and ABAC Betas
- Create a tag policy
- Create a Unity Catalog catalog, schema, and table
- Apply governed tags to columns
- Create a UDF
- Create a column mask policy
- Select your table using the policies
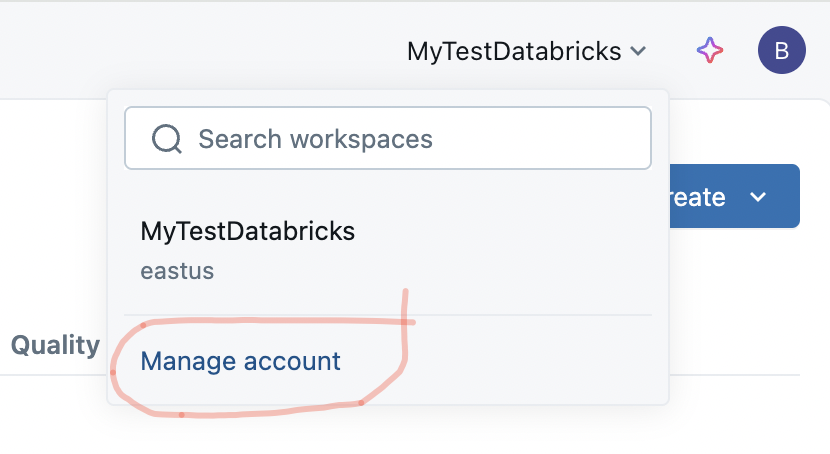
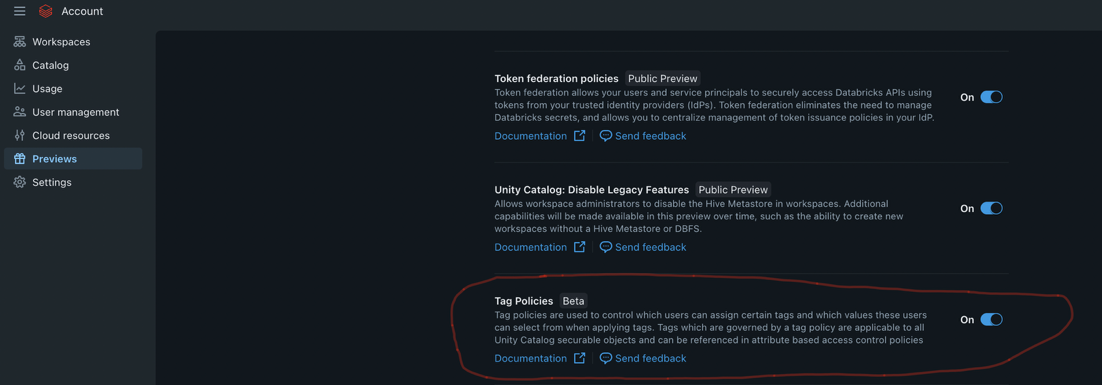
The first step is an easy one (maybe not) depends on who you are, as that step requires you to be an account administrator and a workspace administrator. Since I was working in my own personal azure environment, I was both of those things. All it takes is going into the manage account section and clicking on previews and then you must scroll down to turn on the feature for Tag Policies.
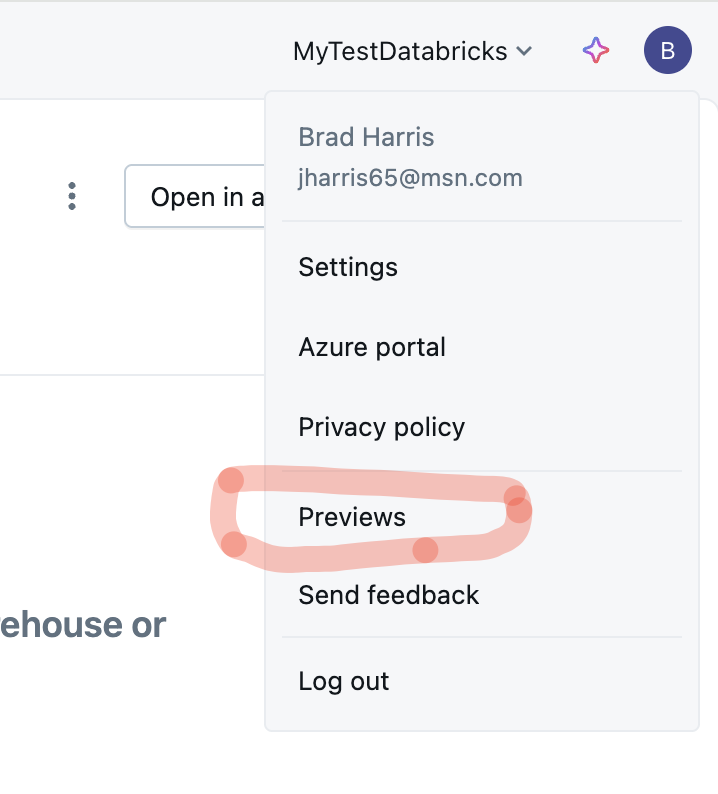
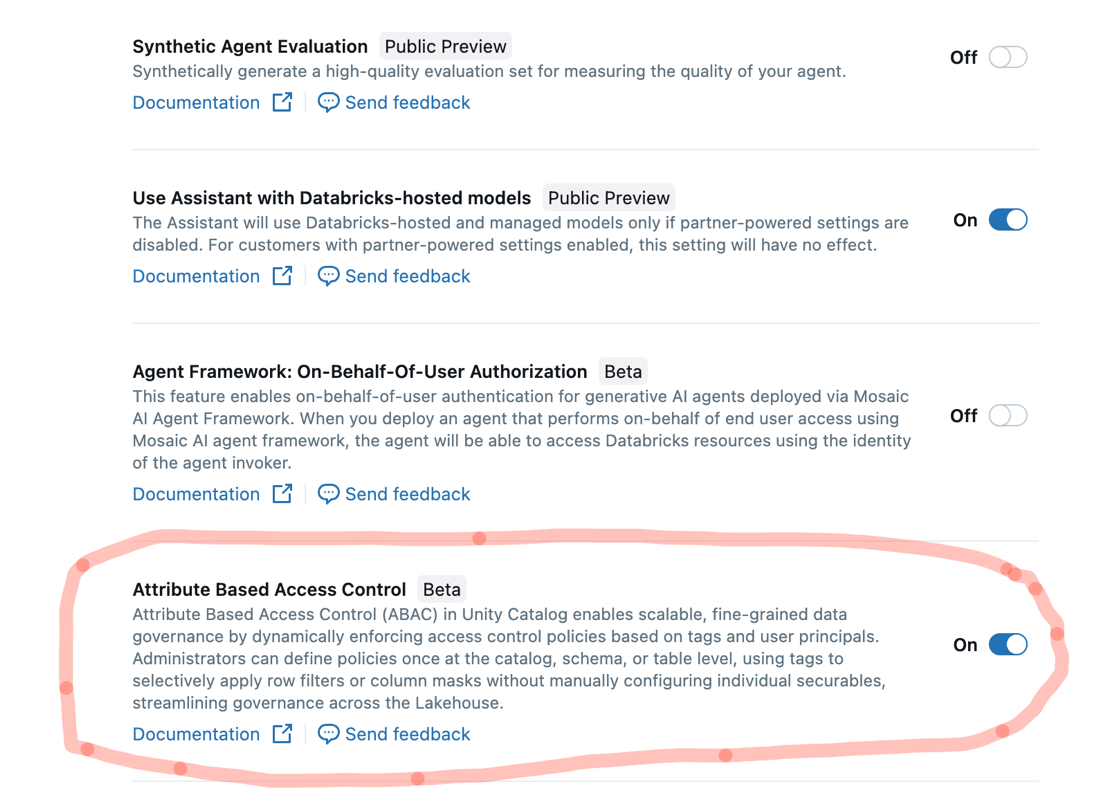
After that as a workspace admin you will go to your user account and click on previews. Within the reviews you will find a feature called Attribute Based Access Control. You will need to turn that on as well. After that you should be ready to go.
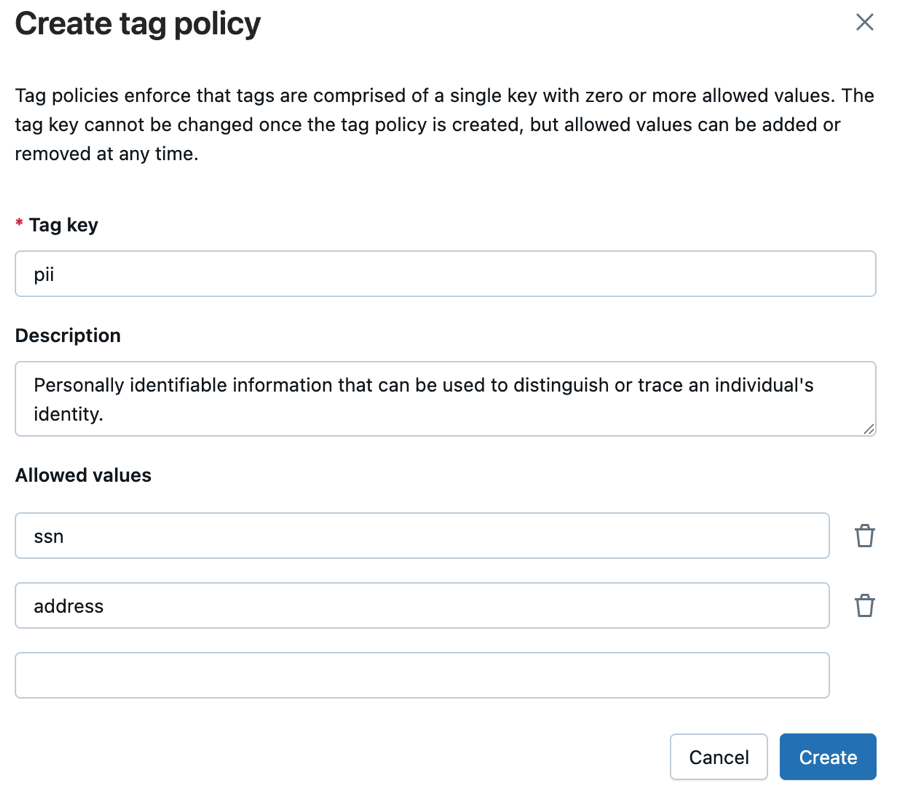
The Second step in the process is to simply create a tag policy. For this tag policy we are just going to create a policy for PII data. One thing to point out and probably repetitive as the screenshot records, is that in your tag policy once you have given it a name it cannot be changed, but the allowed values in the tag policy can be added and removed at any time. Once settled on your tag policy go ahead and clicked create.
The third step is obvious… We are going to need a catalog, schema and a table to work with. So, I just created a simple catalog and customers schema with a profiles table and filled it with data to further work our example from.
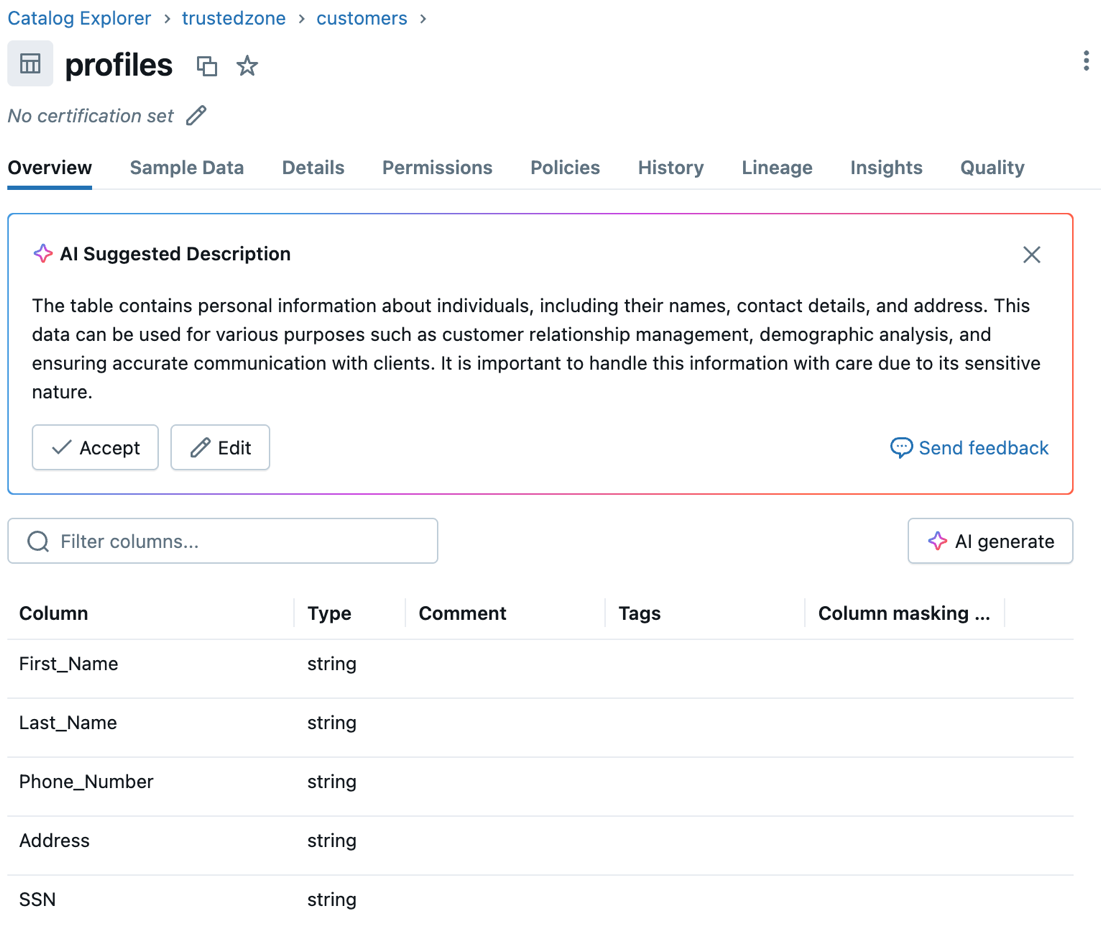
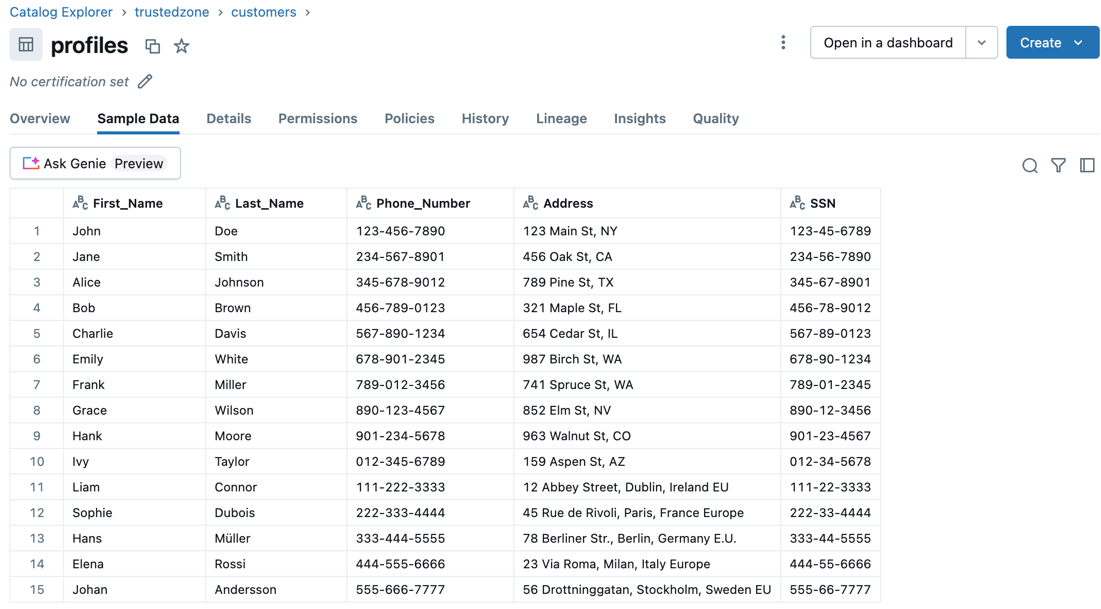
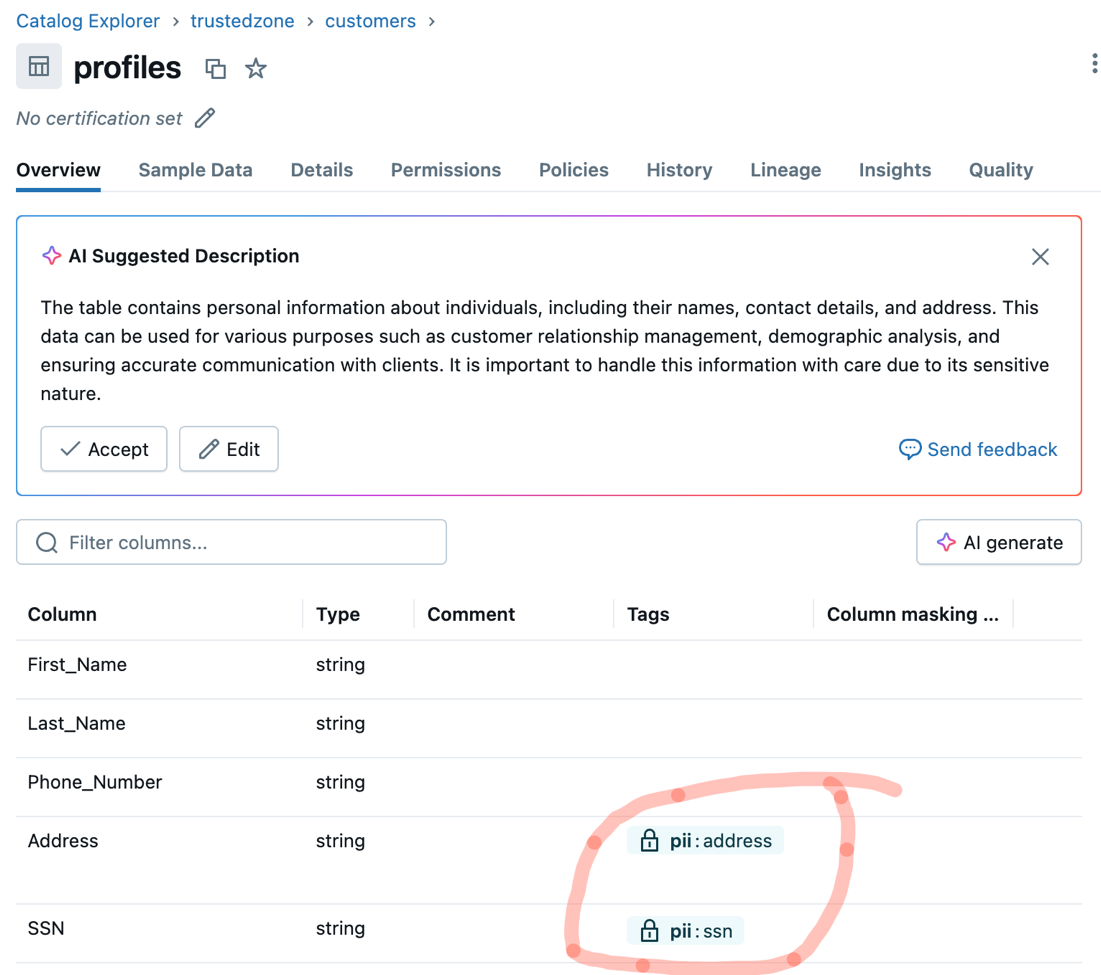
After that, and as you can see in the screenshots there are no tags. So, you guessed it, the next step is to add some governed tags to the PII columns. Being that this is somewhat of a condensed example, in this scenario we are only really going to be concerned with the SSN column. But you could continue with setting access control around the address column at your leisure. So, with a simple SQL script we can set those tags.
— Add the governed tag to ssn column
ALTER TABLE trustedzone.customers.profiles
ALTER COLUMN SSN
SET TAGS (‘pii’ = ‘ssn’);
— Add governed tag to address column
ALTER TABLE trustedzone.customers.profiles
ALTER COLUMN Address
SET TAGS (‘pii’ = ‘address’);
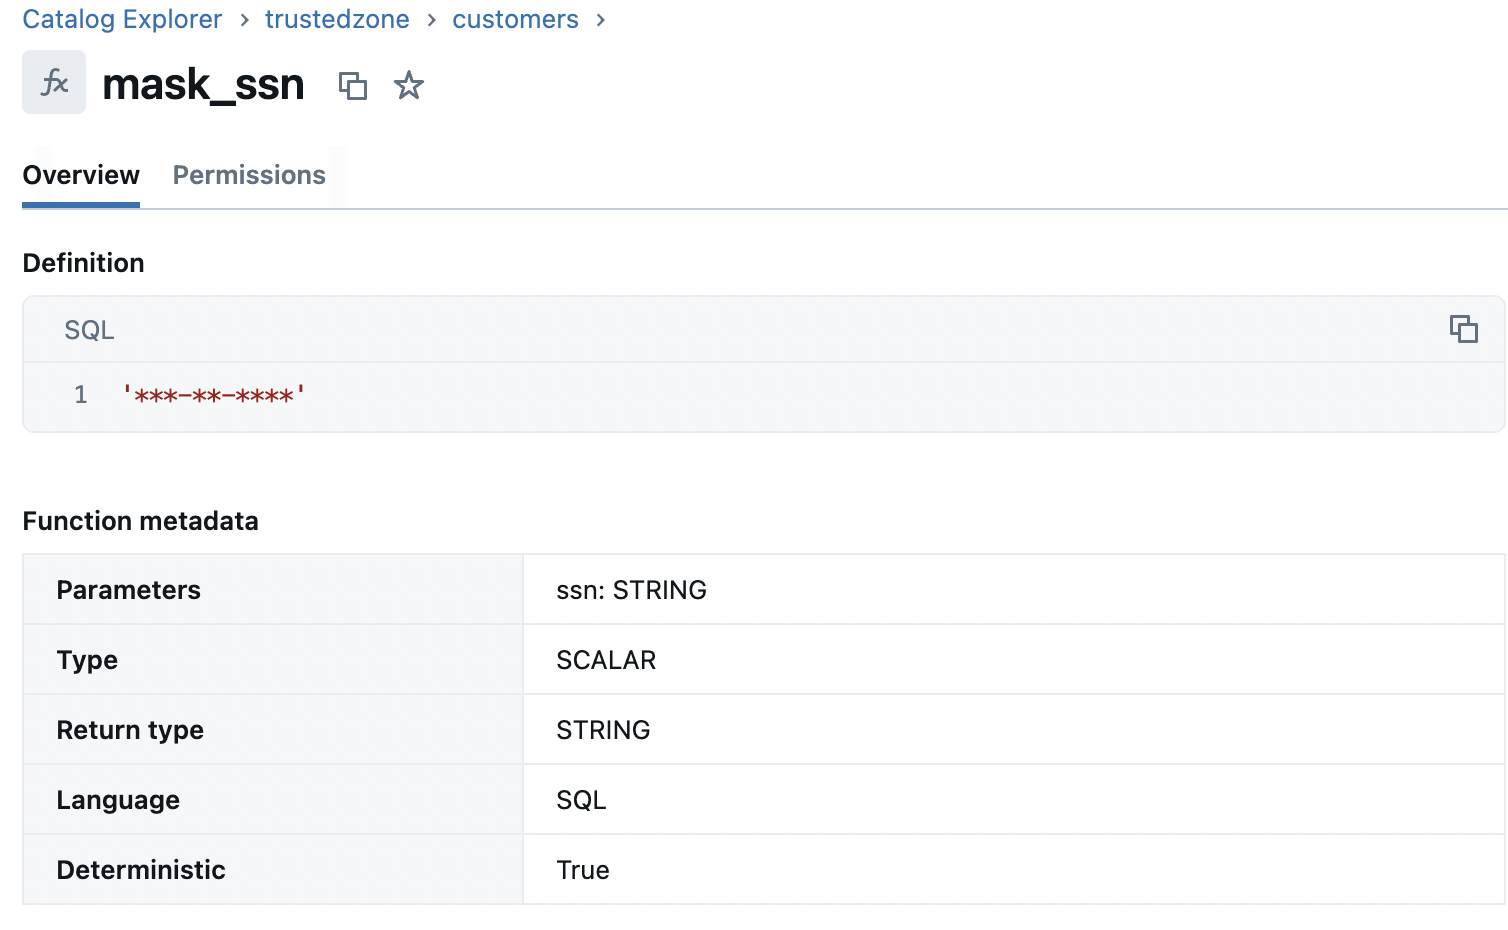
For the fifth step in the process, we are going to create a simple UDF (User Defined Function) within our trustezone.customers schema that is going to mask the SSNs by a fully masked SSN string (‘***-**-****’).
— Masks any SSN input by returning a fully masked value
CREATE FUNCTION mask_SSN(ssn STRING)
RETURN ‘***-**-****’ ;
For the seventh step in the process and for this scenario we are going to create a column mask policy. The column mask policy basically defines who can see or not see the SSNs in the profiles tables for which we setup the user defined function for. When applying the mask policy, it is self-evident (at least I think) that we are going to setup a policy that uses the UDF created previously that prevents all account users from directly viewing the SSNs that are in the SSN column within the profile table. So, let’s walk through that.
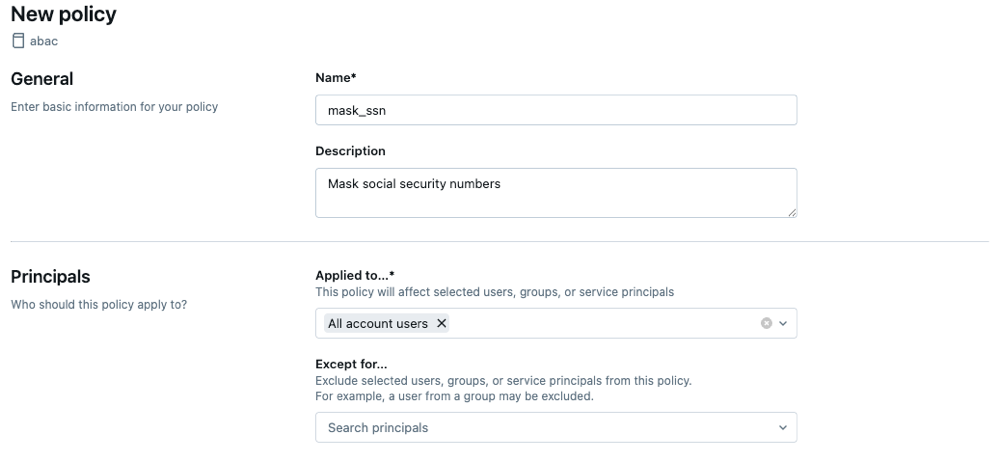
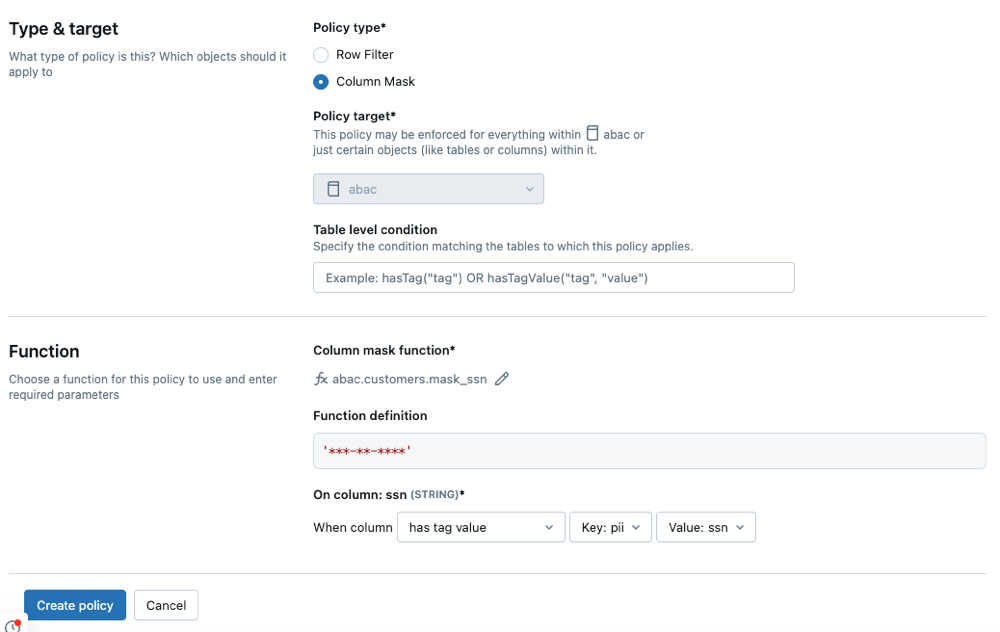
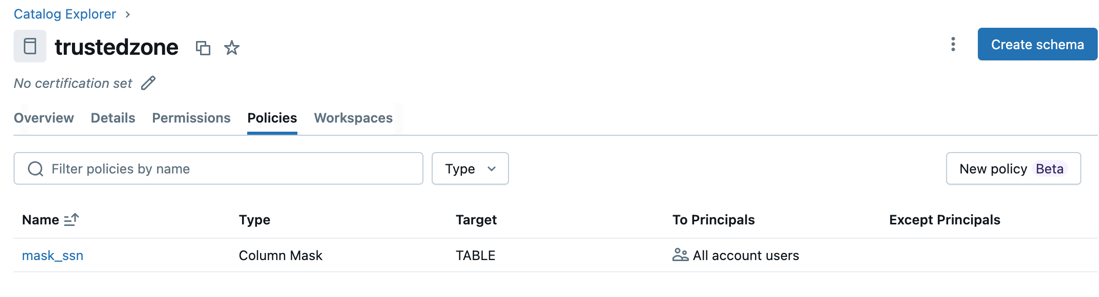
So, with the policy created the only thing we have left to do is figure out if it worked. Since we applied the policy to all account users this should include everybody including administrators, but in a real-life scenario obviously this policy would be applied to different groups that are created where some groups would be able to see the data and others would not. Let’s see if our scenario works. We can do this by simply running a query against the profile table and if everything was successful you should see that the SSN column is now masked with a ‘***-**-***’ string indicating that the policy is working based off the tag that you applied to the column.
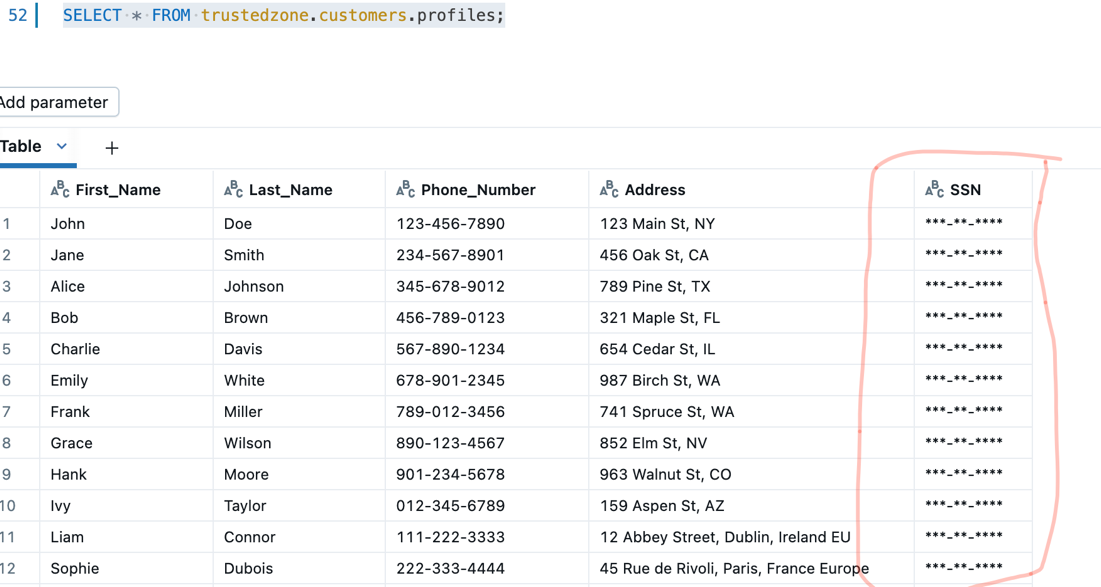
So, as you can see when selecting from the table the SSN column is now masked. The tag policy is being applied, and it is using the UDF function to mask the column. Now I would venture to guess that if you removed the tag from the SSN column this would no longer work but, further expands the flexibility that you can achieve with Attribute Based Access control, which could be a different discussion for a different day. Great!! So, there you go, a simple example on how to implement Attribute Based Access Control.
For the Less-Visual Non-Techie Folks:
So, for those readers that just glossed over all the meat and potatoes on how to setup Attribute based access control and wanted to get right to dessert, here is a perfect example for you.
Let’s say you’ve got this table: customer_orders with tags like:
| Column | Tag |
| ssn | pii=tru |
| pii=tru | |
| order_id | pii=false |
Now, with ABAC:
- Interns? Can only query order_id.
- Full-timers in Compliance? Can see everything.
- Marketing? They get email, but not ssn.
Boom… data exposure minimized, productivity maximized.
Attribute based Access Control in Databricks is:
- More flexible than roles alone
- Scalable across regions and orgs
- Secure (no more “public by accident”)
- Your legal team’s new best friend
- Fun to explain at parties* (*Depends on the party.)
Final Thoughts
Attribute-Based Access Control on Databricks is like giving your data platform contextual awareness. It’s not just “who you are,” but “what you’re trying to do,” “where,” “when,” and “why.”
If your data lake feels like the Wild West, it’s time to bring in ABAC as the sheriff. And maybe give RBAC a well-earned retirement party.
Further Reading
https://docs.databricks.com/aws/en/data-governance/unity-catalog/abac/
https://docs.databricks.com/aws/en/data-governance/unity-catalog/abac/tutorial