")

By: Austin Gainey
The Microsoft Power Apps platform offers a variety of tools and applications that can make interacting and communicating with your users or customers much more efficient.
It is always in your client’s best interest if you can deliver easy-to-use tools that drastically cut down on the number of emails required to solve problems. Too many emails can cause work stoppage and/or inefficiency in your client’s user base.
In the example below, I will show how you can utilize Microsoft Forms, Power Automate, and SharePoint online (all included with a subscription to Office 365) to create a straightforward way for your customers to communicate to you when they are experiencing a problem, while at the same time providing the necessary info you might need to solve the problem in ONE email.
The Problem
In our scenario, we currently are the admins of an on-premises Power BI Report Server environment which hosts several thousand SSRS (SQL Server Reporting Services) reports that we migrated from an old SharePoint instance.
Our organization also has access to Power BI in the cloud and the users are frequently adding to the content that is hosted in the Power BI cloud workspace.
The support requests for both the on-premises reporting as well as the Power BI cloud are starting to fill up in our inbox, and we find ourselves spending more time sending emails than we do solving reporting problems for our customers.
We need a way to get more information from our users when they initially contact us for support.
The Microsoft Power Apps Solution
In the list of Office 365 apps, select “Forms” to create a support request form. The goal of the form will be for our user base to provide more detailed information about their support requests.

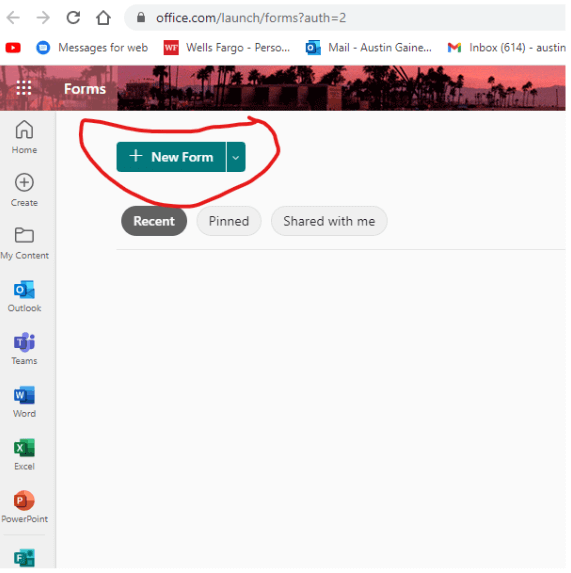
2. In Microsoft Forms, select “New Form”.
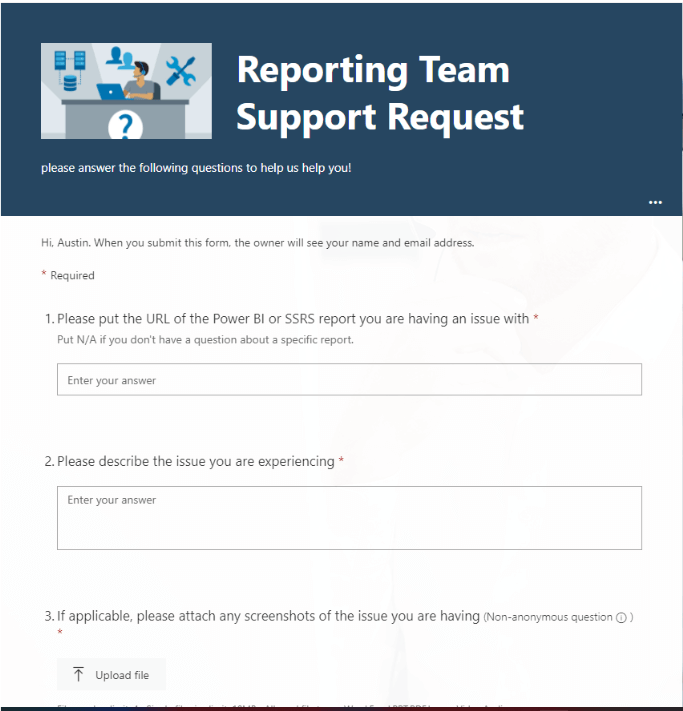
3. Name the form and create questions that will provide the most value to your team when a user submits a support request. Microsoft Forms supports many different question types, including text, multiple-choice, date/time, files upload, etc.
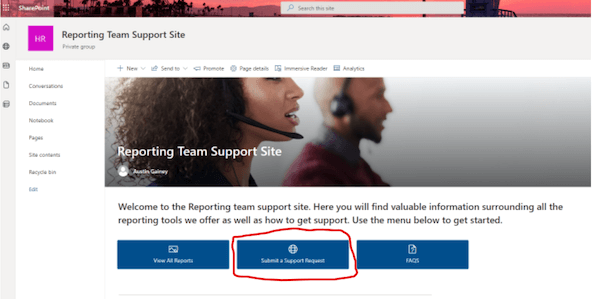
4. Awesome! We have the support request form. Now we need to provide an easy location for our users to access this form. Utilizing a SharePoint online page with an embedded button to the form is a simple way to achieve this. The “Submit a Support Request” button takes the user directly to the form submission page we just created.
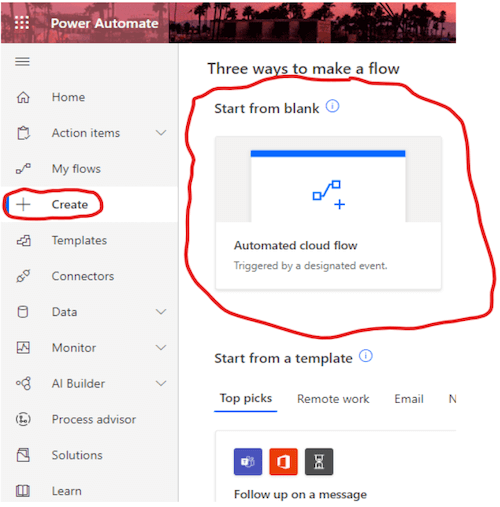
5. Our solution is starting to take form. Now, we need to add the automation element to really have this be effective for the Reporting Team. We can connect all these elements in Power Automate to run specific tasks when a user submits a new support request.
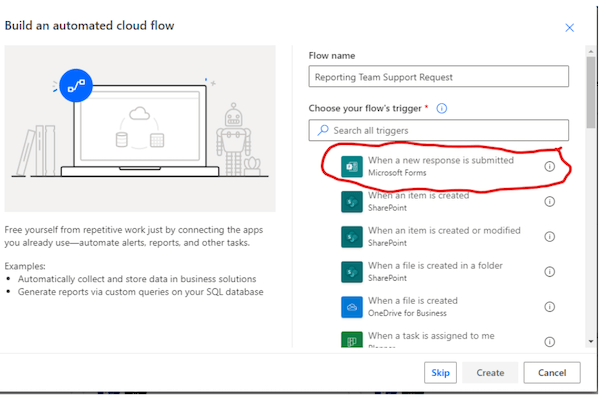
Open Power Automate and select “Create” and choose a blank “Automated Cloud Flow” as the template.
6. Name the flow and select a trigger that will start the flow. In this case, select “when a response is submitted” from the Forms application. This will give us the starting point for our flow when a user submits a new form.
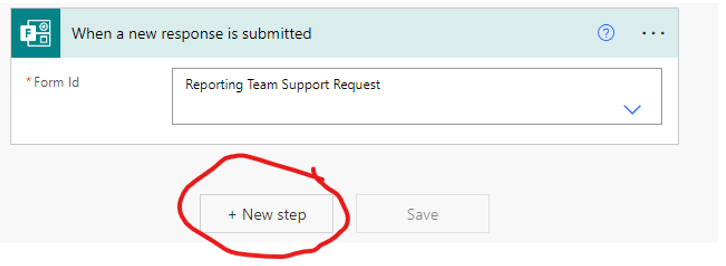
7. To start building the flow, we need to select the Support Request Form we created and then select “New step”.
8. Now we need to get the actual details of the response. In the new step details search for “forms” and select “Get Response Details” from the list.
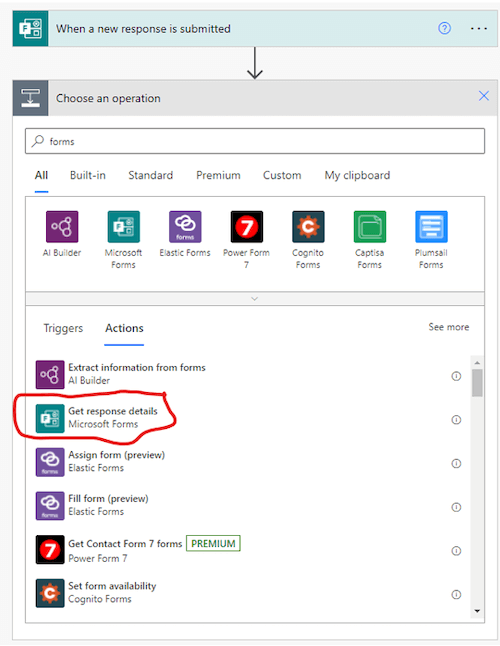
9. Fill in the details and select the Response ID. Doing this gets the details (answers, submitter identity, time stamp etc.) of each form response.

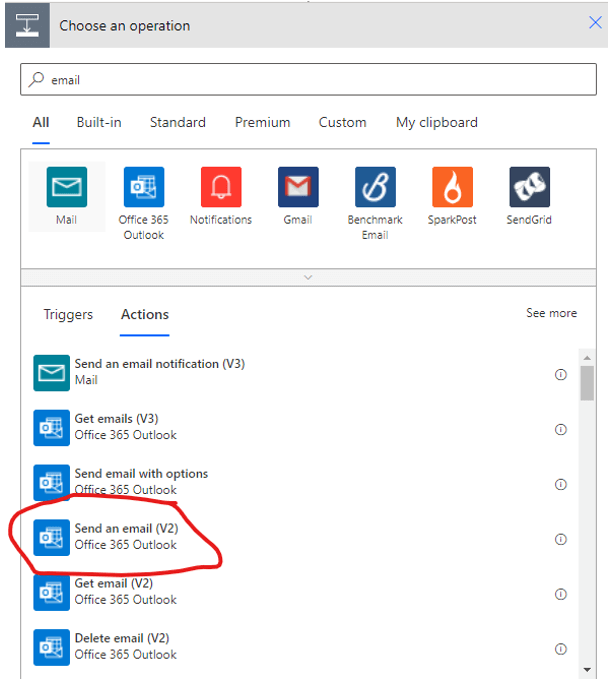
10. Now that we have the details of each form response, we can use that to alert the reporting team that a new support request has been submitted by adding an email action to our flow.
Select “New Step” in the flow, and in the search bar type in “Email”, select the action “Send an Email (V2)” and add it to the flow.
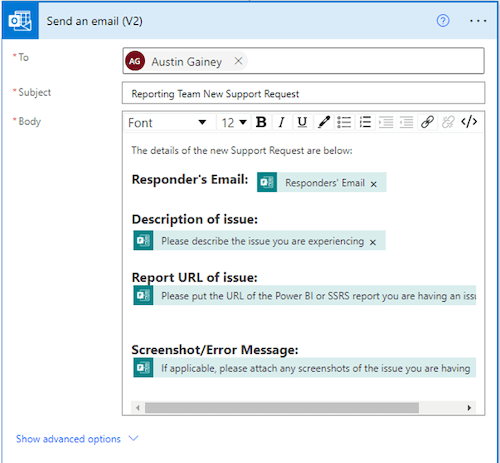
11. Almost done! We need to create an email template with the details of the form submission that will be sent to the reporting team automatically when a support request is submitted.
In the email, details fill out usual suspects of an email:
To:
Subject:
Message Details:
The message details are where the answers to our form can be included to build out the details of the support request in our email.
The link between Forms and Power Automate makes it simple to dynamically select what we want to display from our form submission and include it in the email to the reporting team.

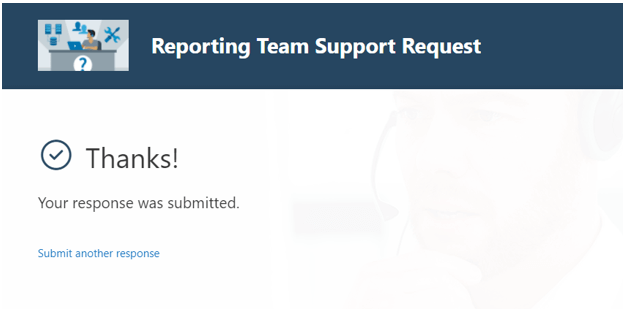
12. Firing on all cylinders now! The flow is ready to be tested. To kick off the new process, go to the Form and submit a support request.
View the automated email we built. Notice all the fields from the Form the user submitted are included in the email.

There is even a link to view the screenshots the user attached:
That’s it! The reporting team now has a great tool that is easy to maintain and is effective in getting the information they need to diagnose problems their user base may be having.
I personally have implemented this type of solution with a client, and it has drastically cut down on the back-and-forth communication it takes to resolve issues. Let me know in the comments how you have implemented Microsoft Power Apps in your organization!
If you would like Key2 Consulting to streamline your data and business processes, please visit our contact us page.
Thanks for Reading! Questions?
Thanks for reading! We hope you found this blog post useful. Feel free to let us know if you have any questions about this article by simply leaving a comment below. We will reply as quickly as we can.
Keep Your Data Analytics Knowledge Sharp
Get fresh Key2 content and more delivered right to your inbox!
About Us
Key2 Consulting is a boutique data analytics consultancy that helps business leaders make better business decisions. We are a Microsoft Gold-Certified Partner and are located in Atlanta, Georgia. Learn more here.